Use and maintenance of Berkey® water purifiers
Refer to the assembly document* for a diagram and precise instructions on how to assemble your stainless steel Berkey® water purifier.
This documentation also contains instructions for setting up the filtration elements.
For more details, you can refer to the specific document on priming the Black Berkey® elements*
(*) : original documentation in English, provided in French at the time of purchase or upon request.
Whether it's the Black Berkey™ filters or the Berkey® PF-2™ filters, it is necessary to prime them before their first use or after a long period of storage.
You can refer to the Black Berkey® filter priming document and also the PF-2™ filter priming document (documents in English, provided in French at the time of purchase or upon request).
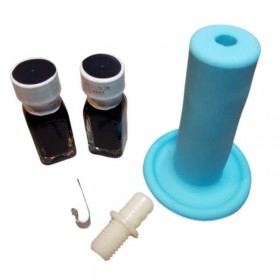
To facilitate the priming of the Black Berkey® filters, and if the space under your faucet is limited, there is also a priming pump, which is very practical and allows you to prime the Black Berkey® filters anytime, anywhere.
Black Berkey Primer™ is a manual pump that allows for easy priming of Black Berkey™ filter elements without the need for faucet pressure or when there is limited space under the faucet.
Priming the Black Berkey® purification elements is essential to expel air and saturate the filters with water before use.
The Primer™ pump also allows you to purge the Black Berkey® purification elements with air to clean the filter pores if necessary and to dry the filters for long-term storage (see information on storing Black Berkey® filters for details).
The Primer pump therefore allows you to:
1- Eliminate debris that can accumulate in the filter pores during use,
2- Reduce the time and effort required to dry the filters before storage,
3- Facilitate the priming of the elements when water pressure is not accessible or when space under the faucet is limited, such as with a small sink.
4- Black Berkey® filters should never be primed with contaminated water. This is the case, for example, if you only have access to reclaimed water such as rainwater, borehole water, well water, etc. You must prime them with the Black Berkey® Primer pump. It is an essential tool in these conditions.
The Black Berkey Primer™ is specifically designed for use with Black Berkey® purification elements.
Find the instructions for using the Black Berkey Primer™. To complement this information, you can watch a video on using the Black Berkey Primer™.
Black Berkey® water filters are so effective that they can remove red food coloring from water. This is a foolproof way to test your system and ensure it is functioning correctly.
The purpose of this test is to confirm that the system has been assembled correctly and that there are no internal leaks in your system. We recommend performing this test after the initial assembly of our systems, after removing or replacing Black Berkey® elements, or during the first use after drying and storing the elements for an extended period.
The dye test is designed only for Black Berkey® purification elements. It should not be performed for the Sport Berkey® bottle or the PF-2 filters.
The food coloring must be RED, LIQUID and ARTIFICIAL
. Red food coloring (unlike other colors) does not contain minerals, so your filter will treat it as a contaminant and filter it out.
You can find this food coloring in small bottles at specialty or arts and crafts stores. You must use a liquid coloring, not gel, and check its composition: it should not contain glucose, E330, or thickeners. The coloring should not be E120 Carmine (cochineal) or E162 Betanin (beetroot).
Therefore, ensure that the food coloring used contains either E122 (carmoisine), E123 (amaranth), E124 (Ponceau), E127 (Erythrosine), E129 (Allura Red), or E180 (Rubine).
Be aware that some red colorings also contain E102 (Tartrazine yellow) in their composition, which is also not suitable for the test.
The red food coloring test should be performed after priming your Black Berkey® purification elements and WITHOUT THE PF-2 FILTERS™.
TO PERFORM THE TEST:
- Start by removing all Berkey PF-2™ filters (if installed). If they remain in place, the warranty on these filters will no longer be valid.
- Take only the upper chamber (with the Black Berkey® elements installed) and place it on containers (glasses, cups, vases...) of similar size so that there is a container under each filter. This will isolate any defective or leaking filters.
- In a separate container filled with water, add the food coloring according to the proportions indicated below. Mix well. DO NOT pour the coloring directly into the tank.
Prepare a mixture with the volume indicated below:
COLORING DOSAGE for standard European brands
3-5 drops of red food coloring per 4 liters of water.
MCCORMICK COLORING DOSAGE recommended by Berkey®
10 drops per 4 liters of water, as follows:
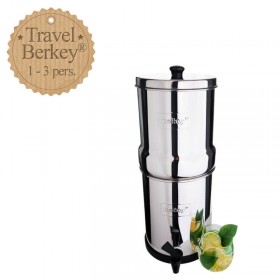
- Travel Berkey® - 4 liters of water, 10 drops
- Big Berkey® - 8 liters, 20 drops
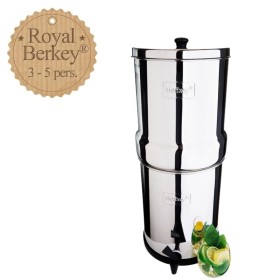
- Royal Berkey® - 8 liters, 20 drops
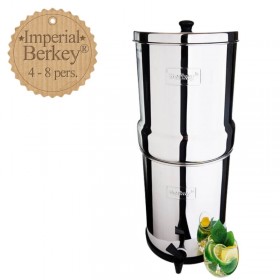
- Imperial Berkey® - 8 liters, 20 drops
- Crown Berkey® - 8 liters, 20 drops
It is not necessary to completely fill the upper chamber for larger models, as long as the filters are fully submerged.
- Let the water flow into the containers.
If no red food coloring appears in any of your containers, your purification system is working correctly.
If the water in any of the containers is red or has a pink tint, the filter in question is either defective, nearing the end of its life, or not sealed properly, allowing water to flow between the seal and the tank.
IF YOU NOTICE COLORING IN ANY OF THE CONTAINERS, PLEASE CHECK THE FOLLOWING:
- Are the nuts properly tightened? Do not use tools to tighten them. They should be hand-tightened for a perfect fit. Over-tightening the nuts could deform the threads, preventing a proper seal.
- Have you used "red food coloring"? Red food coloring is the only type recommended for this test.
- Is the washer on the stem properly placed inside the upper chamber with the nut fixed underneath? If the washer is outside the chamber with the nut, you will not have a proper seal, causing your system to malfunction. Place the washer inside the upper chamber and retest.
- Are the blocking plugs properly sealing the unused holes (without filtering elements)? Are the plugs installed and tightened with a washer on each side? If the plugs are leaking, the test will fail. Tighten the plugs more firmly and retest.
- If you are testing an element that has already failed, rinse and re-prime it. Retest.
If, despite all these precautions, a filter fails the dye test, please contact customer service.
When performing the test a second time, consider taking a video of your actions (mixing the dye, filling the upper tank, filtering into separate containers). Proof is required in case of a positive test and a claim.
Most people use a carafe or jug to pour water into the upper chamber. If you have a tap with a pull-out spray hose on your sink, this can also be a good solution.
The upper chamber, which only temporarily holds water, will need to be cleaned less frequently than the lower chamber where water stagnates for longer periods. We recommend cleaning the lower chamber once a month.
The stainless steel chambers can be cleaned with soapy water.
In areas with hard water, lime deposits may accumulate on the spigots and chambers after prolonged use. To remove them, you can use pure vinegar or a 50-50% mixture of vinegar and water that you spray and let sit for about 15 minutes. Then wipe with a ScotchBrite pad or a soft brush, wash with soapy water, and rinse.
Yes, it is entirely normal for 2 to 3 cm of water to remain in the upper and lower chambers. For water to be filtered, it must pass through very fine micropores in the filters. The lower the water level in the upper chamber, the lower the pressure available to force the water through the micropores. You may have noticed that the filtration rate is much faster when the upper chamber is full than when it is half empty. This is because there is more pressure. The only way to remedy this would be to enlarge the pores of the filter elements, which would reduce the effectiveness of the Berkey purification system. During each cycle, the residual water from the previous cycle mixes with the water from the current cycle and is then purified. Therefore, there is no need to worry about the excess water during normal use. However, if you stop using your filter for an extended period, such as during a vacation, it is best to empty both chambers and let them dry completely.
Regarding the lower chamber, the spigot cannot technically be positioned at the bottom of the tank for sealing reasons. Don't worry; this is not stagnant water as it will mix again and again during successive filtrations.
We recommend replacing your water filtered by your Berkey® system after three days if it has not been consumed. If the water is in a cold environment, this period can be extended to one week. This is a precautionary principle. The reason is that when you filter your water, the chemicals that inhibit bacterial growth are removed. In very humid environments, bacterial growth can occur more quickly.
It is strongly advised against letting your filters freeze. Similarly, it is strictly discouraged to store the elements (even unused ones) in very cold climates. Residual water inside the element will expand and consequently enlarge the pore size, eventually destroying the element. Whether your filters are unused or already used and completely dried, a small amount of moisture could still remain inside, especially in predominantly humid climates. This moisture could expand inside the filter and render it unusable. Please note that this recommendation applies to ALL Berkey® elements, including the Sport Berkey® bottle. Freezing your element and making it unusable will also void your warranty coverage.
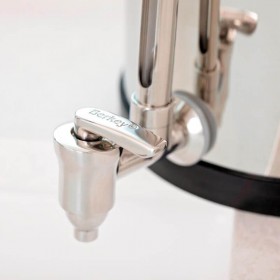
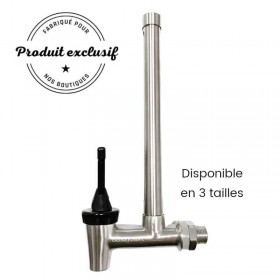
If you need to transport your Berkey® filtration and purification system, you must first remove the Black Berkey® purification elements. If you do not remove them from the system, you risk breaking the stems. Place your water filters in a safe and sealed package. The upper and lower stainless steel parts fit into each other to facilitate transport and save space. If your system is equipped with a sight glass spigot, be sure to remove it or secure it so it does not break.
Important: Failure to remove the filtration elements from the system may result in broken stems and will void the manufacturer's warranty.
This mainly occurs with the use of hard water (highly mineralized). Such water is inherently more alkaline and has a higher pH. Alkaline water has less potential to keep dissolved minerals in solution compared to more acidic water. Over time, the minerals start to precipitate and, depending on their composition, they will either sink to the bottom or float to the top. This process is called flocculation. It is harmless and is not a sign of a malfunction in your system. The white residues are minerals that were already in your water and are now simply visible, whereas they were previously invisible due to their suspension in ionic form.
Filters that have not been properly cleaned and primed, or if you have not fully cleaned and rinsed your tanks, the water from your initial filtrations may have a distinct, almost mineral taste. You can discard the first 2 or 3 filtrations.
If this issue continues, ensure that the black gaskets on the Black Berkey® filters are correctly positioned on the upper tank and not with the wing nuts in the lower tank.
If required, you may need to clean your tanks again and reprime your filters.
The following response applies to all models in the Berkey® range, with adjustments for volume calculations.
The volume of each model refers to the volume of the lower tank. This means you can have up to 8.5 liters of filtered water in stock.
Explanation: The upper tank is slightly less voluminous for safety reasons to prevent overflow if the lower tank is not completely empty.
To be more precise, for the Big Berkey, the top tank has a volume of 8.32 liters. Additionally, the volume of the Black Berkey® filters must be taken into consideration. Each filter has a volume of 0.51 liters.
If your Big Berkey is fitted with 2 filters, you can fill a maximum of 7.3 liters of water.
You will actually fill slightly less than this because there is always about 2 cm of water remaining at the bottom of the tank (see explanation here).
Also, when you have emptied the lower tank, roughly 1 liter of water will still left in the bottom of the tank (see the previous link).
The amount of water you can put in the upper tank has been carefully designed and determined by the manufacturer to allow, in regular use, a volume of 8.5 liters of filtered water in the lower tank, whilst preventing a risk of overflow.
Tip: If you would like to completely empty the bottom tank into a jug, this can be done by tilting your Berkey® forward gripping the knob on the lid.
This issue is likely due to an airlock phenomenon between the upper and lower tanks. A minimum air gap is required between the two tanks; otherwise, the water will not flow from the tap, and the upper chamber will not be fully filtered.
- The first thing to check if water is present between the two tanks, which can be caused by overfilling the upper tank (even if it was just once!). Be sure to thoroughly dry the bottom rim of the upper tank and the inside of the top of the lower tank, and be cautious during future refills.
- If this does not resolve the issue, you should install the Berkey® Stainless Steel Anti-Airlock Clip, which clips onto the edge of the lower tank.
The Anti-Airlock Clip will prevent and resolve the insufficient air gap issue. Without an air gap between the two tanks, an airlock phenomenon occurs, disrupting the gravity flow of your system.
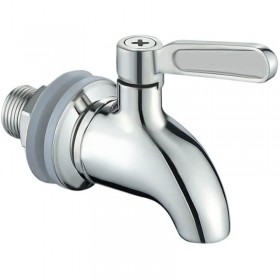
Check the items in the sachet with the tap: 1 tap, 1 nut, 2 washers (either 2 flat or 1 flat and 1 beveled).
Find out if the leak is coming from the spout (where the water is supposed to come out) or from where the tap meets the stainless steel tank.
- If the leak is coming from the spout, tighten the round base under the lever in a clockwise direction.
- If the leak is in the area where the tap meets the tank, check that the washers are correctly installed. If they are, tighten the tap nut using a wrench (millimeter by millimeter). Ensure that all surfaces are dry before tightening, to avoid the washers from slipping during tightening.
- If these two option do not solve your problem, contact our customer service.

